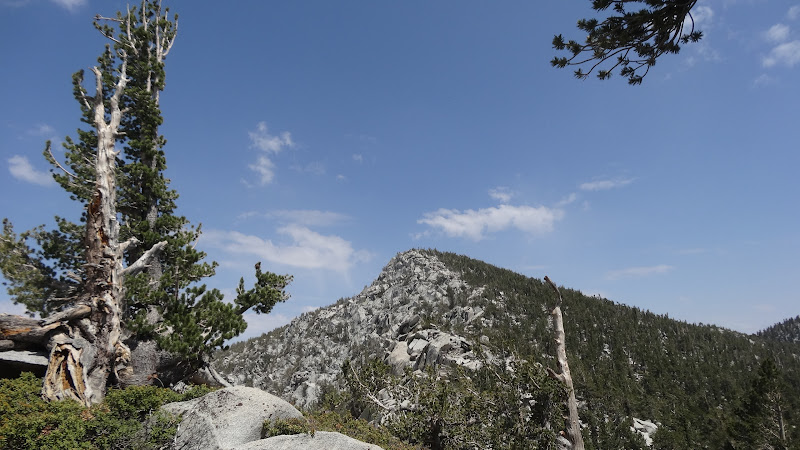
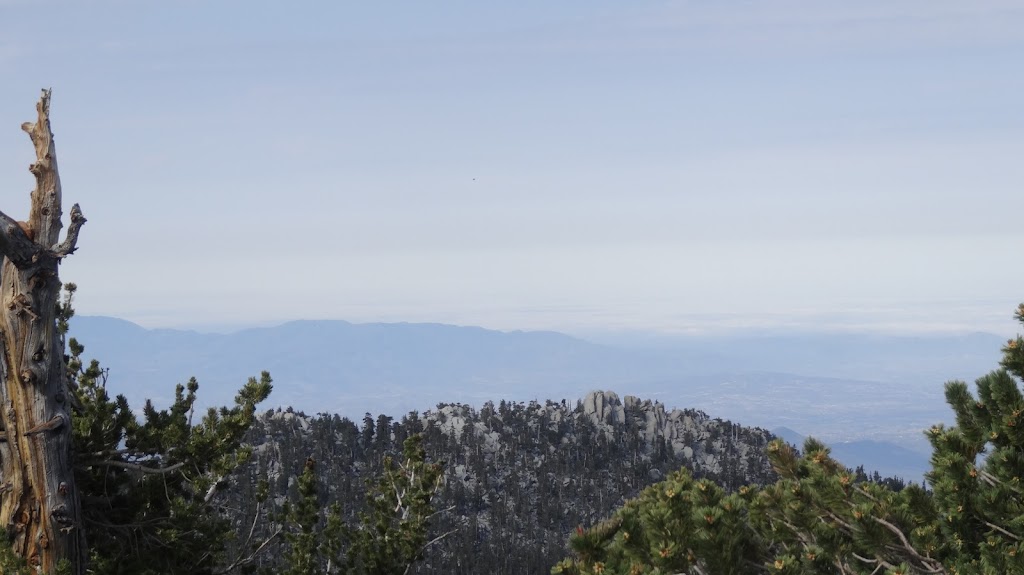
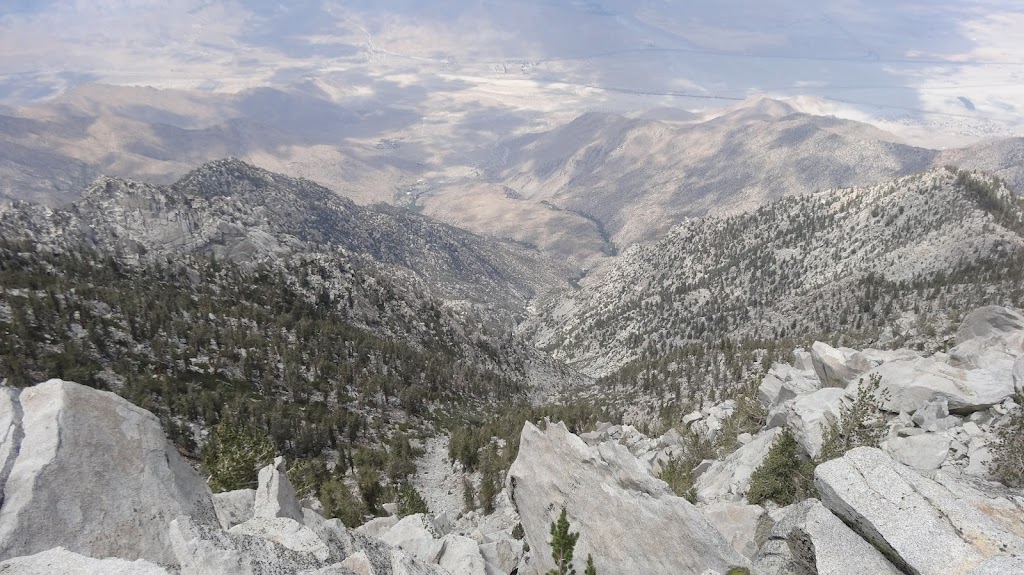
There are seven summits above 10,000'/3000m in the San Jacinto Mountains of Southern California. These seven summits are concentrated in a single area that stretches from San Jacinto Peak (10,834'/3302m) in the north to Marion Mountain (10,362'+/3158m+) in the south.
 |
| The Seven Summits of San Jacinto |
The Seven Summits are (in descending order of height):
- San Jacinto Peak (10,834'/3302m)
- Jean Peak (10,670'/3252m)
- Folly Peak (10,480'+/3194m+)
- Shirley Peak (10,388'/3166m)
- Marion Mountain (10,362'+/3158m+)
- Newton Drury Peak (10,160'+/3097m+)
- Miller Peak (10,000'+/3048m+)
Notes:
1. The US Geological Survey (USGS) has not specified an exact height for every peak. The height of peaks whose exact height is not known is listed as the height of the last highest contour interval on the map followed by a plus ("+") sign.
2. An exact height is listed for a point on Marion Mountain is specified by the USGS, but the specified point is NOT the highest physical point on the mountain. Therefore the height of Marion Mountain is listed as the height of the highest point with a known elevation followed by a plus ("+") sign. See Is Marion Mountain "Wrong?" for further information.
3. There may be some controversy as to whether or not Shirley Peak and Miller Peak are truly peaks since they barely rise above their adjoining saddles. However, since these names are in common use, I list them as peaks here.
4. Shirley Peak is an unofficially named peak. In other words, the name "Shirley" has not been officially recognized by the USGS Board of Geographic Names. Herein, I use the name "Shirley Peak" since it is the name commonly used for that topographic feature even though the name is not official.
This past July 4 weekend, I set out to climb all seven. There are half a dozen or more trails that one could use to access the area that contains the seven summits.
 |
| Trails that reach the high country of the San Jacinto Mountains |
Key to the above map:
Red: Deer Springs Trail, parts of which are the route of the Pacific Crest Trail (PCT)
Green: Marion Mountain Trail
Lavender: Seven Pines Trail
Dark Blue: Trail to Wellman Divide from Saddle Junction, parts of which are the route of the Pacific Crest Trail (PCT)
White: Strawberry Trail, all of which is part of the PCT
Black: Tamarack Trail which is no longer maintained
Light Blue: Main trail to San Jacinto Peak from Round Valley via Wellman Divide
For this hike, I choose to start on the Seven Pines Trail since it had been some time since I had hiked that trail.
 |
| Trailhead sign, Seven Pines Trail |
Now, whereas the nearby Marion Mountain Trail was apparently designed by a sadist (it's one of the steepest trails in Southern California), the Seven Pines Trail was apparently designed by a drunk. What the Marion Mountain Trail does in just 2.5 miles, the Seven Pines pines trail takes 3.8 miles (the sign says 3.5 miles, but the State Park service official mileage is 3.8), crisscrossing the N Fork of the San Jacinto River no fewer than three times in its roundabout ramble up the mountain.
The trail is a lovely trail for the most part, passing through mixed oak and conifer woodlands.
 |
| The Seven Pines Trail, before the first crossing |
But the trail shows a lot of signs of neglect, with downed trees left where they lay.
 |
| One of many downed trees on the Seven Pines Trail |
Immediately before the first crossing of the N Fork of the San Jacinto River, one passes from the federally controlled San Bernardino National Forest to the state controlled Mt. San Jacinto State Park. A wilderness permit is required for all travel beyond this point.
 |
| State Park boundary sign on the Seven Pines Trail |
Shortly after entering the state park, one crosses the N. Fork of the San Jacinto River which was dry on the day I crossed. See
Water Sources of the San Jacinto Mountains for details on which water sources are reliable.
 |
| Seven Pines Trail, first crossing of the N Fork of the San Jacinto River |
Hiking further along, I encountered a number of lovely flowers, including this Mariposa Lilly.
 |
| A Mariposa Lilly on the Seven Pines Trail |
Soon, I came to the second crossing of the N. Fork, where I came upon another beautiful flower, this time a personal favorite of mine, a Lemon Lilly.
 |
| A Lemon Lilly at the second crossing of the N Fork |
Beyond the second crossing, the Seven Pines Trail follows a small creek that is not marked on the map through a meadow. Here, I saw more beautiful Lemon Lillies.
 |
| More beautiful Lemon Lillies on the Seven Pines Trail |
Soon, I crossed the North Fork for the third time and joined the Deer Springs Trail which comes up from the town of Idyllwild from a trailhead on Hwy 243.
 |
| Junction with the Deer Springs Trail |
I'm always struck by how poor the signage is for such a well traveled trail. After all not only is the Deer Springs Trail the principal trail on the west side of the San Jacinto Mountains in a popular state park, it is also the Pacific Crest Trail (PCT), a National Scenic Recreation trail which receives special funding. Despite this, there is no indication that this is the PCT, nor is there much in the way of directions other than those to Little Round Valley and San Jacinto Peak, both of which are not places a PCT through hiker would visit. The signage is so much better in the nearby San Gorgonio Wilderness.
Very close by, one can see the sign for the Marion Mountain Trail. The Seven Pines and Marion Mountain Trails join the Deer Springs Trail in almost the same location.
 |
| Trail sign for the nearby Marion Mountain Trail |
Turning left (east) on the Deer Springs Trail, I soon come to Deer Springs Crossing, where the water from Deer Springs crosses the Deer Springs Trail. Unfortunately, there was no water at the crossing the day I went by.
 |
| Deer Springs Crossing was dry on July 5, 2013. |
Fortunately, I was able to find a small pool just upstream from the crossing. Using a sierra cup, I was able to scoop enough water to drink.
 |
| Using a sierra cup to gather water from a very small pool. |
I would not count on finding water at Deer Springs in a dry year. It's kind of funny that the major trail on the west side of the San Jacintos, the Deer Springs Trail, is named for a relatively minor, unreliable water source. Bed Springs, further NE along the trail is far more reliable. Again, see
Water Sources of the San Jacinto Mountains for details of which water sources are reliable.
Having resupplied with water, it was time to leave the trail and head up toward my first peak, Marion Mountain. I had some general information about a relatively brush free route that would lead me up to Marion Mountain from Deer Springs Crossing. I wasn't sure exactly which gully was the right one, but seeing a lack of brush in the right hand gully above Deer Springs Crossing, I headed up.
 |
| Heading up the right hand gully that leads up from Deer Springs Crossing |
The way proved to be clear and lead straight into the high country. I stayed generally on climber's left of the gully, but I eventually crossed to the right hand side near this big boulder as the terrain changed.
 |
| I crossed to the right side of the drainage at this large boulder |
My approximate route is marked on the first map in this post.
As I ascended, I got into increasingly coniferous terrain, and I had some good views to the north of the San Gorgonio Wilderness.
 |
| San Gorgonio Mountain as seen from the flanks of Marion Mountain |
The route got rockier as I ascended, but I was continually surprised: My route generally stayed class one with only a couple of class two bits until I got right up near the peak. The peak itself was class three. See
the Yosemite Decimal System for a description of the classes.
 |
| Nearing the summit of Marion Mountain |
As I neared the summit, I got some great views of Tahquitz Peak (8846'/2696m) to the south.
 |
| Tahquitz Peak (8846'/2696m) |
At long last, I reached the summit. I circled around to the east. From the east, I could see the traversing crack that would by my class three route to the summit.
 |
| Summit bloc of Marion Mountain. Route indicated in red. |
I then proceeded to the base of the summit bloc on the north side. From below the start ascent route looks like this:
 |
| Start of the ascent route to gain the top of the summit bloc of Marion Mountain |
One climbs the flake behind the dead pine tree and then traverses right on the more or less horizontal crack. The horizontal crack leads to this much larger vertical crack.
 |
| Vertical crack leading to the top of the summit bloc of Marion Mountain |
From the summit, I could see many of the peaks that I would be doing later on in my hike.
 |
| The high country of the San Jacinto Mountains |
I descended the way I came. The crack looks possibly a bit intimidating in this photo, but it's really not bad.
 |
| Descending the vertical crack on Marion Mountain |
From Marion Mountain, I descended to the flats just to the north and then went cross country toward Shirley Peak. It was helpful to have a map and compass here since trees sometimes obscure the view of the peak. That said, navigation was not particularly difficult.
 |
| Flats between Marion and Shirley Peaks |
Looking back as I approached Shirley Peak, I glimpsed a clear view of the summit bloc of Marion Mountain and the ascent route.
 |
| Summit bloc of Marion Mountain. Ascent route marked in red. |
Finally, I reached the small summit bloc of Shirley Peak.
 |
| Summit bloc, Shirley Peak |
From the summit of Shirley Peak, I had a great view of the Tahquitz Valley. Sadly, a major fire broke out a couple of weeks later (the Mountain Fire) which burned a good portion of the Tahquitz Valley. The current status of this area is unknown to me at this time.
 |
| Tahquitz Valley from Shirley Peak |
Oddly, the summit register on Shirley Peak listed the peak's name as LePake Peak. There's no official USGS name for this peak, but Shirley Peak is the commonly used for this summit. Perhaps someone unaware of the name just decided to give it one?
 |
The summit register on Shirley Peak lists the name "LePake".
Perhaps Mr. or Ms. LePake is a friend or loved one of the first three people in the register? |
The route from Shirley Peak to Jean Peak is fairly obvious although there is one false peak in between. Once on Jean, the summit isn't particularly distinct, but it's somewhere in the pile of rocks to the right. I was generally able to find a class one route through the rocks.
 |
| The summit of Jean Peak |
From the summit area of Jean Peak, I could see my next objective: Miller "Peak".
 |
| Miller "Peak" |
I place the word "Peak" in quotes because as can be plainly seen Miller Peak isn't much of a peak. Miller barely rises above it's adjoining saddle. Still, it's an interesting bit of rock to climb, it's elevation is (just barely) over 10,000', and it has an official USGS name, so I headed on over.
At this point I was running low on water and I had heard of a brush free route that I wanted to try, so rather than staying on the summit ridge, I went looking for a route down to Wellman Divide. This looked rather promising:
 |
| The start of my route down from Jean Peak to Wellman Divide |
Unfortunately, I didn't find the route I was looking for and ran into some brush. Fortunately, the brush wasn't too bad, and I made my way through without undue difficulty. I'll have to look for the correct route next time I'm up there. I did pass through an interesting flat area just above Wellman Divide.
 |
| Flat area above Wellman Divide |
Reaching Wellman Divide, I turned south and went to Wellman Cienega for water.
 |
| Wellman Cienega (north branch) |
Resupplied with water, I took the trail back through Wellman Divide as though I were taking the main route to San Jacinto Peak. At the great switchback just below Miller Saddle, I left the trail, headed the short distance to the saddle, and turned right (east) toward Miller Peak. Miller Peak is just a little knob of rock that barely rises above the level of the Saddle.
 |
| Miller "Peak" |
The top of Miller Peak is adorned with this plaque commemorating one Frank Miller.
 |
| Commemorative plaque on Miller Peak |
Despite the fact that Miller Peak isn't much of a peak, the views are pretty good.
 |
| Palm Springs Aerial Tramway, Mountain Station, as seen from Miller Peak |
 |
| Jean Peak from Miller Peak |
 |
| Leatherneck Ridge and desert from Miller Peak |
From Miller Peak, I west directly up the east ridge of San Jacinto Peak.
 |
| Heading up the east ridge of San Jacinto Peak |
If you look for it, you can still find a lot of the old trail that ascended this ridge. This is the most direct route to the summit. The old east ridge trail is very clearly a constructed trail, not just a path worn into the ground by the passage of many feet. Judging by the workmanship, the east ridge trail appears to have been constructed by the CCC during the Great Depression. The majority of the trails in the high country of the San Jacintos were constructed by the CCC during the Great Depression.
 |
| The old east ridge trail |
After a short saunter up the east ridge, I arrived at the summit.
 |
| The summit of San Jacinto Peak |
I didn't stay long at the summit. Whereas I had had all previous summits to myself, the summit of San Jacinto was awash with crowds. I quickly moved on to one of the most interesting traverses in the San Jacintos, the class two route from San Jacinto Peak to Folly Peak. The route drops fairly steeply down the west face of San Jacinto Peak and basically follow the ridgeline over to Folly Peak.
 |
| Cross country route (class 2) to Folly Peak from San Jacinto Peak |
The views to the north along the route are outstanding.
 |
| Looking north into the Snow Creek drainage. |
On the north face of the Folly - San Jacinto Ridge, there are many interesting pinnacles and rock formations.
 |
| Pinnacle on the north face of Folly Peak |
From the flanks of Folly Peak, I could look south and see much of the country I had already covered this trip.
 |
| San Jacinto high country from vicinity Folly Peak |
And looking back towards San Jacinto Peak, I could see the route I had come down. Again, I think the route down the west ridge of San Jacinto peak is one of the most interesting class 2 routes in Southern California.
 |
| San Jacinto Peak from Folly Peak |
Folly Peak's summit isn't particularly apical or distinct, but there are some great views of Fuller Ridge and the country to the west.
 |
| Looking west from the summit of Folly Peak |
Well, six down and one to go! From Folly Peak, I started the long traverse, mostly class 1, to Newton Drury Peak.
 |
| Traversing to Newton Drury Peak which can be seen behind the trees to the right. |
Newton Drury is a fairly easy peak that can be bagged via a class one route if one stays on route.
 |
| Ascending Newton Drury Peak |
The summit of Newton Drury Peak is home to this, the world's toughest little tree, just barely clinging to life on the very summit of Newton Drury.
 |
| World's toughest little tree |
Heading down from Drury Saddle to Little Round Valley is a pretty quick trip, on the order of 10 minutes. Nobody was up and around at the seasonal ranger station in Little Round Valley when I passed through.
 |
| Little Round Valley Ranger Station |
Little Round Valley was dry in the main part of the meadow when I passed through on July 7, 2013.
 |
| The creek in Little Round Valley. Dry on 7/7/2013. |
However, there was a little bit of water at the SW end of the meadow. That said, I would not rely on finding water in Little Round Valley in a dry year.
 |
| Water in Little Round Valley. Can you spot the little bird taking a bath? |
From Little Round Valley, it's only about a mile and a half down the Deer Springs Trail back to the Seven Pines Trail.
 |
| Nice, new trail sign at Little Round Valley |
The Deer Springs goes through the lovely Lilly Spring area, one of the best wildflower viewing areas in the San Jacintos.
 |
| Lemon Lillies, near Lilly Spring on the Deer Springs Trail |
 |
| Shooting Stars, Lilly Spring |
 |
| Mountain Rhododendron, Lilly Spring |
But Lilly Spring, as good as it is, isn't the only place along the Deer Springs Trail for wildflower viewing. Here is a Columbine near Rock Spring.
 |
| Columbine |
Ranger's buttons, also near Rock Spring.
 |
| Ranger's buttons |
Shooting Stars near Bed Springs Crossing.
 |
| Shooting Stars |
There are other intriguing things on the west side of the San Jacintos like this massive rock on the flanks of Folly Peak. Has it ever been climbed?
 |
| Massive Rock near Folly Peak |
Reaching the Fuller Ridge Trail, I'm almost done with my peaking bagging loop through the San Jacintos.
 |
| Trail sign on the Deer Springs Trail for the Fuller Ridge Trail. |
Again, I'm amazed at the poor quality of the signage in the area. There's nothing really to indicate that the PCT turns off the Deer Springs Trail here and follows the Fuller Ridge Trail, nothing except some penciled in letters. Neither is there any indication as to what lies down the trail nor are there any mileages listed.
Shortly after passing the Fuller Ridge Trail junction, I returned from whence I came, the Seven Pines Trail, which I then followed back to my car.
I hope you've enjoyed this little peak bagging trip in that most favored of Southern California mountain ranges, the San Jacintos.
HJ
Appendix I. Overall Route Map.
 |
| Overall route map. First section in green. Second section in blue. |
Appendix II. The Seven Summits in a Day.
I did the above described trip as a backpacking trip, staying overnight. I had wanted to hike the Seven Pines Trail, explore several routes, and investigate some water sources in addition to bagging the seven summits. However, there's no reason a fit person couldn't do all seven summits in a single day, given a sufficiently early start and a good knowledge of the area and the routes thereof. Below, I list a map that might be the route for such a one day attempt on all seven summits.
 |
| Route for the Seven Summits to be done in one day. |
The route would start at the Mountain Station of the Palm Springs Aerial Tramway since that's the highest start one can have. West side trailheads are somewhere above 6,000 feet in elevation whereas the Mountain Station is above 8,000 feet in elevation. From the tram, one would follow the Sid Davis route staying right at the drainage and leaving the main trail. One would then take the old, abandoned but still followable Tamarack Trail up to the main trail coming in from Wellman Divide. One would take the main trail to Miller Saddle and then Miller Peak. From Miller, one would hit all the peaks in counter-clockwise fashion as shown.
The route down from Jean Peak is shown as a dotted line because there are several options. The most logical route would be to descend north from Jean to the saddle between San Jacinto and Jean and from there drop down to the Tamarack Trail which would then be used to return to the tram. I have not done the route down from Jean-San Jacinto Saddle, but I've talked to people who have, and I understand it's class 2 and quite doable.
Alternatively, one could proceed to the small saddle where the trail from Little Round Valley meets the summit trail and the trail from Wellman Divide. One could then proceed down the main trail back to the Tamarack trale and then back to the tram. This route would take longer but might offer some advantage if one were tired and not desirous of trying the class two route down from Jean-San Jacinto Saddle.
Lastly, one could retrace one's steps a bit and follow the route that leads down to Wellman Divide. From Wellman Divide one could proceed down the main trail to Round Valley and from Round Valley back to the tram. If one felt that one would be out after dark for the last sections of the trip, this route down well maintained trails might offer some advantage.
I think it's only a matter of time before someone successfully does all seven summits in 24 hours. The more difficult challenge would be to not use the tram, using some other trailhead instead. The most difficult challenge would be to start in Palm Springs and use the Skyline Trail to hike to Grubbs Notch and then do the seven summits. This would be the renowned "Cactus to Clouds" challenge with six extra summits thrown in, a challenge not to be taken lightly!