The San Gorgonio Wilderness (SGW) is the largest high-altitude wilderness area in Southern California
– a hiker's and backpacker's paradise.
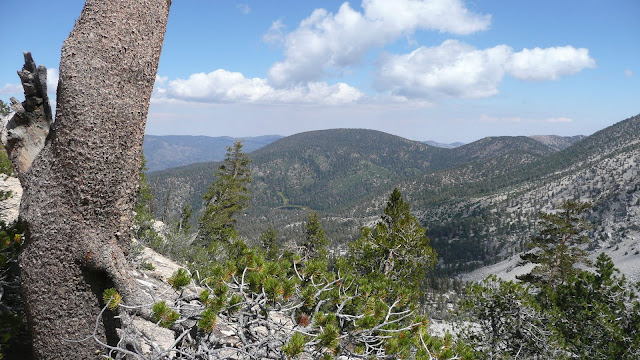 |
| The San Gorgonio Wilderness from Dry Lake View |
But where to hike and backpack in the San Gorgonio Wilderness? I thought I'd lay out six loops as a sort of hiking and backpacking "foundation" for the SGW. You can then build on this foundation, making variants of your own. I list out two example variants, the
Nine Peaks Variation and the
Seventeen Peaks Variation below, but I'm sure you can come up with more on your own. In Appendix I, I describe one area that really isn't accessible via a loop hike but is so worthwhile that it needed to be included: The N. Fork of the Whitewater River area.
For Backpackers and Day Hikers
I happen to really like spending the night out in the wilderness. I think the best way to do all of these loops is as an overnight trip. But that's me. Strong day hikers will be able to do most of these loops in a single day. Whether you want to a day hike or to do an overnight trip, there's a lot of good information here about map errors, map omissions, and water sources. Backpackers will find the locations of the trail camps to be most helpful; these locations are frequently wrong, sometimes seriously wrong, on topo maps including the Tom Harrison San Gorgonio Wilderness map. In addition to the map snippets here, I've also put together an
Interactive San Gorgonio Wilderness (SGW) Map which covers the entire wilderness.
Notes on solitude
The Lost Creek Trail, the upper Momyer Creek Trail (above the junction with the Alger Creek Trail), and the North Fork Meadows Trail are the three least used major trails in the wilderness. The short Columbine Springs Trail is also a lesser used trail. For those desiring a bit of solitude, I commend to you trips that utilize those trails.
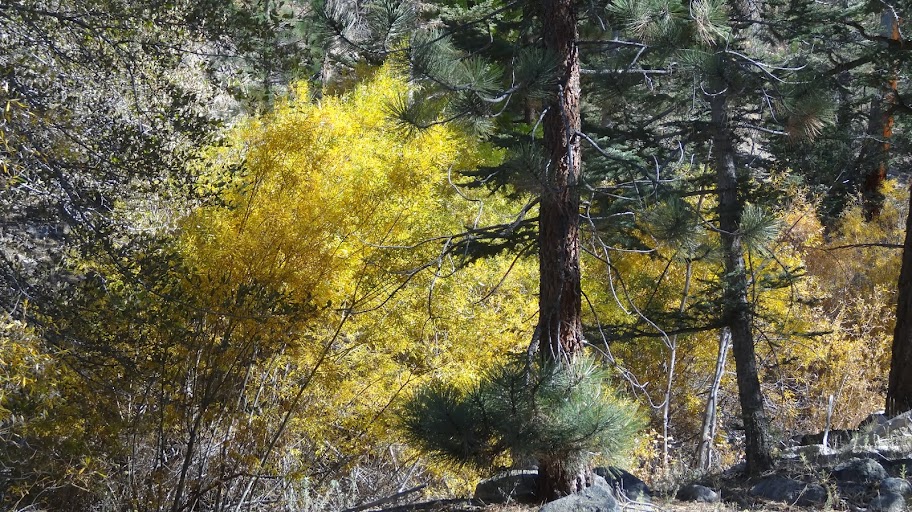
 |
| High Meadow Springs, San Gorgonio Wilderness |
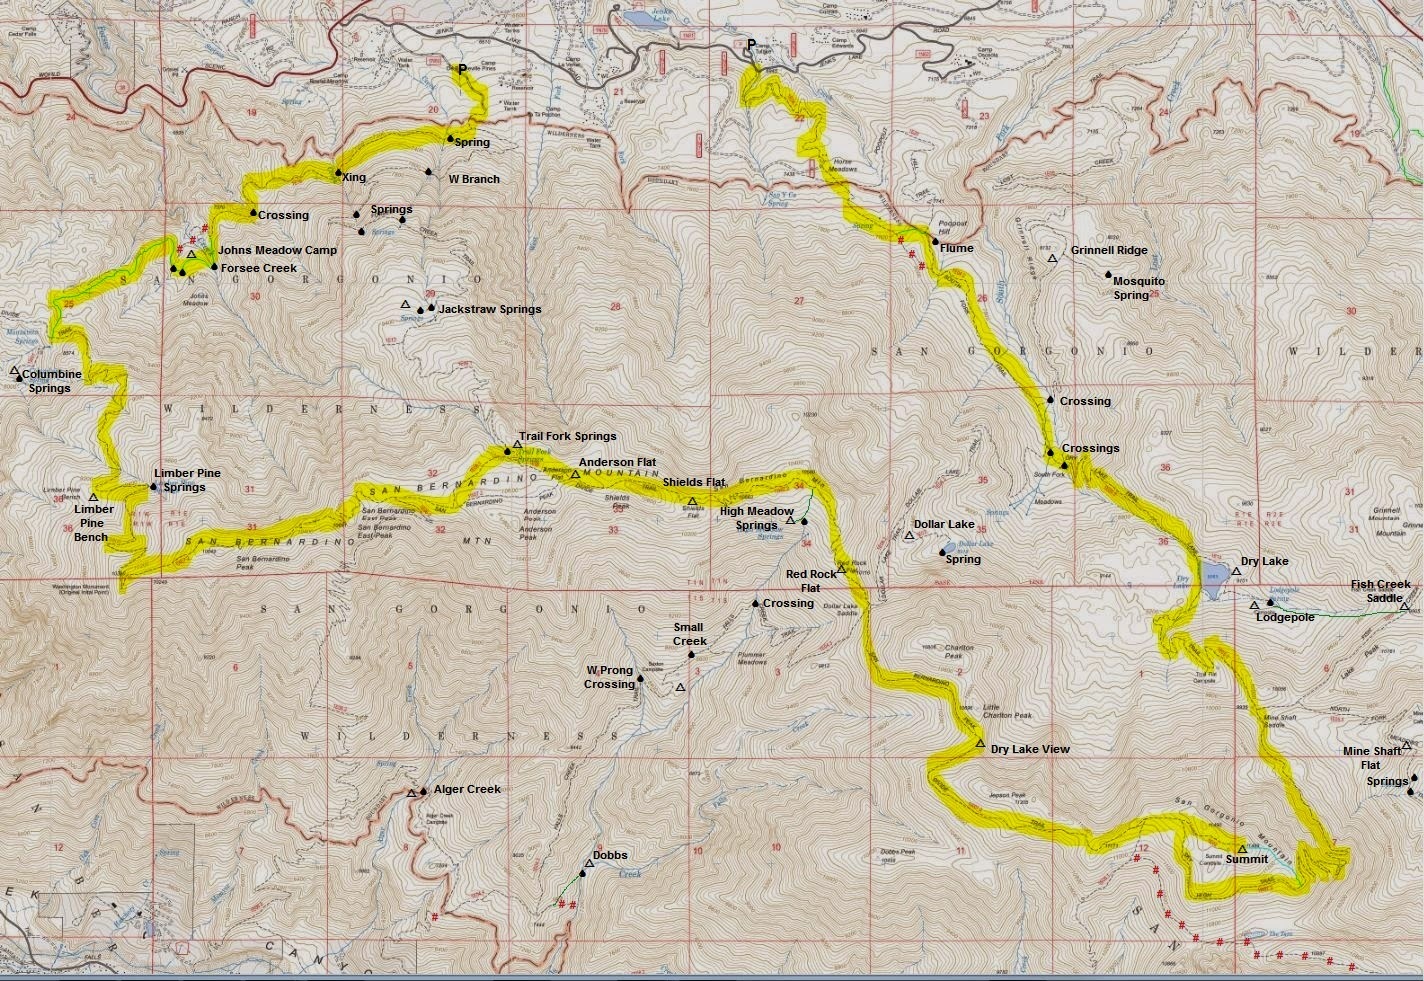
How to Read the Maps
- The principal route is highlighted in yellow.
- Corrections to trails are shown as a bright green line. Note that the bright green lines are hand drawn and should be considered approximate.
- Cross country routes are shown as a bright blue line. The bright blue lines are also hand drawn.
- Triangles ("r") indicate permissible camp sites. Note that you must have a wilderness permit for all hikes (day and overnight) in the SGW and that you must have a permit for the site you wish to camp at if you are staying overnight. See the San Gorgonio Wilderness Association (SGWA) website for further information including wilderness permit applications.
- Water droplet shaped symbols ("S") indicate a water source. Of course there are hundreds of other places you can get water (the entire length of a creek for example), but I've tried to mark some of the most useful ones.
- Red "#'s" indicate a map error that I'm, in effect, blotting out.
- A "^" symbol indicates trailhead parking. On one map I used a bus stop symbol ("u") to indicate the trailhead parking. Because the maps take a lot of work, I'm not at this juncture going to re-do that map. Hopefully people can live with that slight inconsistency. Hey, it's not like you're paying me for this. J
The Six Loops
Here then are the six loops. See also the appendix for other hiking options. Click on any loop to see the details.
I.
The South Fork Loop -- From South Fork trail head to Dry Lake, San Gorgonio Mountain, Dollar Lake, and return.
II.
The Grinnell Loop -- A circumnavigation of Grinnell Mountain
III.
The Momyer - Falls Creek Loop -- Up the Momyer Creek Trail and down the Falls Creek Trail
IV.
The Momyer - Vivian Loop -- Up the Momyer Creek Trail and down the Vivian Creek Trail
V.
The Forsee Loop -- A loop from the Forsee Creek Trailhead, including Johns Meadow Camp
VI.
The "Grand Tour" Loop -- Dry Lake, San Gorgonio Mountain, and Forsee Creek -- Best loop for the "Nine Peaks".
Appendix.
N Fork Whitewater River
I. The South Fork Loop.
Length: 21 miles round trip
This is the classic. It's also the one that everybody does, so don't expect solitude on a summer weekend, especially at the summit of 11,500'/3505m San Gorgonio Mountain, which is one of the highlights of this trip. Still, it's worth doing.
A strong hiker can do the hike in one day, but it's a heck of a lot of mileage. Far better in my opinion to break it up into two or three days. Take your time and savor the wilderness. But each to his or her own.
 |
| The South Fork Loop. Right click and open in a separate tab or window to fully enlarge. |
One night plan: Start at the S. Fork Trailhead. Hike to Lodgepole Spring (reliable water year round except in multi-year droughts). Tank up on water. Hike, carrying your water to Summit Camp. Camp here and savor the sunset. The next day hike down via the Dollar Lake Trail. Strenuous, especially when you're carrying all that water.
Two night plan: Start at the S. Fork Trailhead. Hike to Lodgepole Spring (reliable water year round except in multi-year droughts). Camp at nearby Lodgepole Camp. The next day, head to the summit and savor the view. After summiting, head to Dollar Lake Camp. There should be water
in early season or in wet years coming from a spring at the south end of Dollar Lake. Both Dollar Lake and the spring frequently go dry.
Check the conditions before embarking on your hike.
Map Notes:
1. Errata.
- The USGS topo map shows the S. Fork Trail climbing up over the shoulder above the saddle just west of Poopout Hill. Uh, no. The S. Fork trail goes through the saddle. I've sketched in the route that the trail really takes.
- The topo map shows the S Fork Trail crossing another "trail" labeled the "Poopout Hill Trail." What the map is calling a "trail" is in fact a pretty prominent dirt road. This is the old road to the top of Poopout Hill. The road was closed because it made access to the backcountry too easy and things were getting trampled.
- The topo map shows a trail just south of the summit of San Gorgonio Mountain below the Sky High Trail. The map makers were apparently smoking crack the day they drew up the map. There's no trail there and there never has been. Don't know who dreamed that up.
2. Shortcuts. The spine of the SE ridge of San Gorgonio makes an excellent short cut for those with decent map reading and route finding skills. I've sketched it in with a blue line. This short cut cuts off about a mile. I leave it to you to determine the specifics based on your examination of a detailed topo map. If you're unclear as to the route, you might want to just stick to the trail.
Water sources:
I'll start at the trailhead and go
clockwise. In some times and seasons, there may be other water sources; I'm just trying to hit some of the more important ones here and just those on the route. See other sections for sources off the route.
1. Flume. **** This is the flume that diverts water from the S Fork of the Santa Ana River to Jenks Lake. Just after you pass the wilderness sign near Poopout Saddle, start looking to your left (east). You should see water flowing in the flume below you. The flume for whatever reason isn't shown on most maps but is a nice source of water after you've climbed up from the S Fork Trailhead.
2. Grinnell Crossing. ***** Extremely reliable water, perhaps the most reliable in the entire SGW.
3. Creek crossings in the S Fork meadows area. *****
4. Lodgepole Spring. **** There may also be water in Dry Lake. The water quality at the spring is typically better. There are also some small springs along the trail and at least one big spring below the trail as you come up from S Fork Meadows. The small springs aren't typically worthwhile (too shallow, too low flow). The one large spring is pretty worthwhile, but it's off trail and you've just passed a wonderful source down in S Fork Meadows and you'll soon get to another good source at Lodgepole, so I don't consider it vital.
5. Dollar Lake Spring. ** The spring is at the extreme south end of the lake, just above the lake. Both the lake and the spring frequently run dry in late season.
II. The Grinnell Loop.
Length: 19.5 miles round trip
This might be the easiest loop in terms of steepness and elevation. Some of the other loops gain a lot more elevation and do so at very steep rates. This loop has an advantage in that many parts of it, particularly the Lost Creek Trail, are in lesser used portions of the SGW. There are real chances for solitude here.
Lake Fire Update: The 2015 Lake Fire heavily burned parts of this route. See my updates at the top of this post.
 |
| The Grinnell Loop. Right click and open in a separate tab or window to fully enlarge. |
One night plan: Start at the Lost Creek Trailhead. Hike to Lodgepole Spring (reliable water year round except in multi-year droughts). Camp at nearby Lodgepole Camp. Hike the remainder of the loop on day two. A one night (two day) backpack is very doable, but Dry Lake Camp is one of the most popular camps in the SGW. You might go to the two night plan just to avoid the crowds.
Two night plan: Start at the Lost Creek Trailhead. Hike to Fish Creek Camp. The spring upstream of the camp is seasonal and will often run dry in late season, particularly in dry years. More reliable water is available at the stream crossing about 0.6 miles before camp. On day two, hike to Grinnell Ridge Camp. Water is available at the S Fork of the Santa Ana River (100% reliable all years, all conditions) about a mile before camp. Water may be available in difficult to find Mosquito Spring which is about 0.4 miles east of camp. Do not count on finding Mosquito Spring and even if you do find it there may not be water. The better option is to just carry your water in from the S Fork of the Santa Ana River. It's about a mile hike on a relatively easy trail. Hike the remainder of the loop on day 3.
Map Notes:
1. Omissions. The USGS topo map does not shows many of the trails in the area, but there are decent trails the entire route. The following trails are not shown on most topo maps:
- The Lower Fish Creek Trail. This is the section of trail along Fish Creek below Aspen Grove. Most topo maps show this trail going only part way down the creek. Not true. In reality, the trail goes all the way from Aspen Grove to the Santa Ana River Trail.
- The Aspen Grove Trail/Upper Fish Creek Trail. This section of trail goes from Aspen Grove up to the Fish Creek Meadows where it joins in with the trail coming in from the upper Fish Creek Trailhead. For reasons unknown, it's not shown on most maps.
- The Dry Lake - Fish Creek Saddle Trail. This trail goes from Dry Lake to Fish Creek Saddle. Most topo maps show this trail dead ending at the Lodgepole Spring area. Nope. The trail, although not regularly maintained, goes all the way to Fish Creek Saddle. The trail is signed at both ends.
- The Lost Creek Trail. A lot of topo maps don't show the relatively new Lost Creek Trail. The Lost Creek Trail runs from Grinnell Ridge Camp to the Lost Creek Trailhead near S Fork Campground. A lot of topo maps, particularly older ones, just show the trail going from the S. Fork of the Santa Ana River up to Grinnell Ridge Camp. The trail goes all the way from the S Fork to the Lost Creek Trailhead.
2. Trails that are no more.
- The USGS topo map shows a northern trail leading from the Aspen Grove trailhead down to the Grinnell Mountain Loop that I've described. This is actually an old road, but it's really not followable anymore. Don't anticipate seeing this "trail" as you do the route.
- The USGS topo map shows a trail leading east from Grinnell Ridge Camp. The trail is kind of still there, but it's really not followable anymore. The trail leads to what's left of Mosquito Spring (unreliable; poor water quality; difficult to find). The spring box apparently has collapsed or filled in. The pipe no longer delivers water. It's now just essentially a slow seep. It is however usable in some years. Boil the heck out of it (guess why they call it "Mosquito" Spring).
Water sources:
I'll start at the trailhead and go
clockwise. In some times and seasons, there may be other water sources; I'm just trying to hit some of the more important ones here and just those on the route. See other sections for sources off the route.
1. "Crossing." *** This is the main fork of Lost Creek. Possibly four stars, but I haven't spent enough time there, so I'm going to be conservative and give it three.
2. "Crossing." **** This and the next five crossings (for a total of six) are all along Fish Creek. Six is somewhat arbitrary since you're following the creek fairly closely for much of the way. The water is pretty reliable although I have seen sections of Fish Creek go completely dry in late season. In such a case, simply go upstream (typically) for 100 yards or so, and you'll usually find water.
3. "Crossing." **** This is another crossing of Fish Creek. In particular, this is the last crossing
east of Fish Creek Camp. This crossing is important because it is the last reliable water source before Fish Creek Camp.
4. "Crossing." ** This is the outflow from a little spring
west of Fish Creek Camp. This source is often mentioned since it is the closest to Fish Creek Camp, but it normally runs dry later in the season.
5. Lodgepole Spring. ****
6. Creek crossings in the S Fork meadows area. *****
7. Grinnell Crossing. ***** This is the creek crossing where the Grinnell Ridge Trail takes off and crosses the S Fork of the Santa Ana River en route to Grinnell Ridge Camp. Extremely reliable water, perhaps the most reliable in the entire SGW. This is the best water source for Grinnell Ridge Camp.
8. Mosquito Spring. * Difficult to find. Low flow. Poor water quality. I almost shouldn't mention it, but it is a nice convenient source in the spring
– if you can find it. The map shows an old trail leading to it, but it's nearly impossible to follow the trail which is now only a trace. If you want to try to find it, you just have to hunt around for a patch of greenery over on the ridge shown. It's
not in the drainage where the old trail is shown ending. And it's named "Mosquito" Spring for a reason. I've seen a lot of mosquito larvae in the water.
III. The Momyer - Falls Loop.
Length: 22.3 miles round trip.
This is a tough one. This loop ascends the old Momyer Creek Trail straight up to the San Bernardino Peak Divide. You've got about a mile of vertical gain on the first day. Make sure you've done some good training hikes with similar gain before you take this one on. This hike is in one of the lesser used portions of the SGW. You should have some good opportunities for solitude, particularly on the upper section of the Momyer Creek Trail which is no longer regularly maintained. The upper section of the Momyer Creek Trail is pretty followable, but you should have some decent map reading and route finding skills before taking on this hike.
 |
| The Momyer - Falls Loop. Right click and open in a separate tab or window to fully enlarge. |
One night plan: Start at the Momyer Creek Trailhead. Go up. And up. And up. :) When you get to the junction with the Alger Creek Trail, stay left. And go up. Hit the San Bernardino Peak Divide trail and turn right (east). Head to Trail Fork Springs*** if you need water. Alternatively, you can stay level and head straight to Anderson Flat if you have enough water. Camp at High Meadow Springs**** (reliable water). On day two, head east from High Meadow Springs to Dollar Lake Saddle. Take the Falls Creek Trail south from Dollar Lake Saddle to the Alger Creek Trail. Turn right (west) on the Alger Creek Trail and hike back to the Momyer Creek Trail (the trail you came in on). Descend the Momyer Creek Trail back to the trailhead.
Two night plan: Start at the Momyer Creek Trailhead. Stay at Trail Fork Springs*** the first night. Stay at Dobbs Camp***** the second night. Hike the remainder of the loop on day 3.
Map Notes:
1. Momyer Creek Trail Conditions. The stretch of the Momyer Creek Trail above the Alger Creek Trail is the not regularly maintained section. It's followable but a bit sketchy right at the junction. Bring a topo map and compass and know how to use them. You can augment your your map and compass with a GPS, but a GPS is electronic and therefore susceptible to failure. Best practice is to always bring a map and compass and never a GPS alone. Whatever you bring, know how to use it.
2. High Meadow Springs Camp. There is no trail shown on the map to High Meadow Springs, but a trail does in fact exist, and thanks to the San Gorgonio Wilderness Association (SGWA) volunteer trail crews it is now well marked. There is a use trail from the camp area down to the springs. The route to the springs is also marked.
3. Camp Locations. Anderson Flat Camp and Shields Flat camp are shown in approximate positions. I tried not to obscure the wording on the map. Saxton camp is just plain wrong on the USGS map. I have marked it in the correct position. Alger Creek camp is laughably wrong. The USGS map shows it on a ridge east of Alger Creek. Uh, no. Alger Creek camp is, um, by Alger Creek. Indeed, Alger Creek camp is just west of Alger Creek on the forested bench.
4. Trail to Dobbs Camp and Dobbs Camp. The trail to Dobbs camp is shown taking a sharp right turn at one point and heading directly down a steep near-cliff. Um, no. The trail gradually descend and reaches Falls Creek near the confluence of the east and west forks of Falls Creek as I've sketched in. Dobbs Camp is a general area. The best camp sites in my opinion are in the crook of the "Y" formed by the confluence, and I've placed my triangle symbol there, but there are numerous good camp sites along the east bank of Falls Creek below the confluence.
Water sources:
I'll start at the trailhead and go
clockwise. In some times and seasons, there may be other water sources; I'm just trying to hit some of the more important ones here and just those on the route. See other sections for sources off the route.
Note that the water sources here are all pretty reliable. When there's a drought, this is one of the best routes. The only vital water source that is somewhat questionable in a drought is Trail Fork Springs.
1. Trail Fork Springs. ***
2. High Meadow Springs. ****
3. Plummer Crossing. ***** This is where the Falls Creek Trail crosses W Fork Falls Creek in Plummer Meadows.
4. Small Spring. ** A convenient water source if you're heading downhill en route to Saxton Camp. If it's dry, just get water at West Prong Crossing.
5. West Prong Crossing. **** This is where the trail crosses the west prong of the W Fork Falls Creek.
6. Dobbs. ***** Not really on route, but it won't be described elsewhere, so I'll describe it here.
7. Alger Creek. *****
8. Cedar Spring. **
IV. The Momyer - Vivian Loop.
Length: 22 miles round trip (trail only) or 23.6 miles (including the road walk between the two trailheads).
Similar to the Momyer - Falls Loop, but traverses by means of the San Bernardino Peak Divide Trail over to San Gorgonio Mountain and then descends via the Vivian Creek Trail. Note: There is a either a short car shuttle or short road walk (1.6 miles per Google maps) to connect the two trail heads.
 |
| The Momyer - Vivian Loop. Right click and open in a separate tab or window to fully enlarge. |
One night plan: One night out is frankly a bit of a stretch on this trail. That's a lot of miles. But a strong hiker can do it. Indeed, some very strong hikers do this as a day hike. The real problem for backpackers is that the campsites that are about half way do not have water. But for those willing to pack the water, you can camp at either Dry Lake View or Summit Camp. Alternative to packing in water: Melt snow in the spring.
Two night plan: Camp the first night at either Saxton or High Meadow Springs. Both camps should have water. Spend the second night at High Creek which will have water.
Nine Peaks Variation: For those wanting to summit the classic "nine peaks" of the SGW (San Bernardino Pk, East San Bernardino Pk, Anderson Pk, Shields Pk, Alto Diablo Pk, Charlton Pk, Little Charlton Pk, Jepson Pk, and San Gorgonio Mtn), use the upper section of the Momyer Creek Trail to go directly to the San Bernardino Peak Divide. See the route description for the Momyer Creek - Falls Creek Loop for details. From there, go west to bag East San Bernardino and San Bernardino Peaks. Then come back east to pick up the remaining peaks along the western portion of the San Bernardino Peak Divide. You will re-join the above described route at Dollar Lake Saddle. Note however that
the "Grand Tour" route is the most efficient way to bag the nine peaks in a loop hike. The Grand Tour route is described in section VI, below. See my list of
Southern California Peaks above 10,000'/3048m for details about these peaks.
Map Notes:
1. All comments from the Momyer Creek - Falls Creek Loop apply.
2. The position of High Creek Camp on the USGS topo is wrong. It is not up a side branch of High Creek. It is just east of the main branch of High Creek.
3. The position of Summit Camp on the USGS map is questionable. The sites I'm familiar with are a bit east of the summit and are so marked.
Water sources:
I'll start at the trailhead and go
clockwise. In some times and seasons, there may be other water sources; I'm just trying to hit some of the more important ones here and just those on the route. See other sections for sources off the route.
1. Cedar Spring. **
2. Alger Creek. *****
3. Dobbs. *****
4. W. Prong Crossing. ****
5. Small Spring. **
6. Plummer Crossing. *****
7. High Creek. *** Possibly four stars.
8. "Crossing" near Halfway Camp. **. This is the upper end of Vivian Creek. If dry at the crossing, go upstream 100 yards or so and you may find water there.
9. Vivian Creek. *** Possibly four stars.
10. Spigot. **** There's a spigot with potable water on the south side of the restroom at the trailhead parking lot. The only reason I'm just giving it four stars is because recently they had a sign saying "do not drink" on it. Nothing had been detected in the water, but they hadn't been able to do their mandatory testing. They can't declare the water potable unless they have a current test. I drank the water anyway, and nothing bad happened. This is the only traihead that I am aware of that has water at the trailhead (although there is water when the campground is open near the Lost Creek Trailhead). There is the possibility that they could shut the water off in the winter to prevent freezing pipes.
V. The Forsee Loop.
Length: 17.3 miles round trip.
A nice loop. Very doable as a single overnight (or as a very long day hike). In a lesser used portion of the wilderness, but more used than say the Lost Creek Trail which I believe is the least used of all the trails.
 |
| The Forsee Loop. Right click and open in a new tab to fully expand. |
One night plan: Camp at Trail Fork Springs. Reasonably reliable water here, but check conditions first.
Two night plan: Spend the first night at Limber Pine Bench (fairly reliable water; sometimes dry in late season). I don't recommend Columbine Springs because water is so seldom found there. Spend the second night at Trail Fork Springs (fairly reliable water). You could also stay at Jackstraw Springs, depending on the strictures of your schedule, but the water at Jackstraw is far less reliable. There are a lot of "widow makers" (dead trees just waiting to come down) at Johns Meadow, therefore
Johns Meadow Camp is closed for the foreseeable future.
Map notes:
1. No trail is shown from Johns Meadow Camp to Manzanita Spring, but there definitely is a trail, albeit no longer receiving regular maintenance. I have sketched in the trail in bright green. The trail is signed at both ends.
2. The trail to Johns Meadow Camp is shown switch backing down into Forsee Creek fairly rapidly. This is incorrect. The trail does a couple of switch backs and then contours upstream. I have approximated the true route of the trail in my route sketch.
3. It is important to know that the trail west of Johns Meadow Camp goes
downhill after you cross the small branch of Forsee Creek. It's weird, but knowing that it goes downhill will help. The first time I hiked this trail, I thought I was on the wrong trail for a while. Nope. It really does go downhill at first.
4. Johns Meadow is not located at Johns Meadow Camp. Everyone hikes through the camp and says "where's the meadow?" It's nearby but not visible from the camping area. In other words, if you get to Johns "Meadow" Camp and you don't see a meadow, don't worry. You're not necessarily lost.
5. My triangle indicating the position of Columbine Springs Camp is approximate (less accurate than my other position indications).
6. Limber Pine Bench Camp is actually a pretty big area and fairly spread out. The triangle only marks a small portion of the camp.
7. There's a little spur trail marked 1E17 shown going west off of the Forsee Creek Trail (1E06.1). There is no such trail that I've ever been able to find.
Water sources:
I'll start at the trailhead and go
clockwise. In some times and seasons, there may be other water sources; I'm just trying to hit some of the more important ones here.
1. W. Branch Round Cienega Cr. **
2. "Springs" (three fairly close together). * A lot of the time there is some water flowing over the trail, but the deepest "pools" are usually where water has filled in someone's muddy footprint. No easily recovered water here.
3. Jackstraw Springs. **
4. Trail Fork Springs. ***
5. Limber Pine Springs. **
6. Manzanita and Columbine Springs (on spur trail). * Just a bit of damp ground is usually what you see here. I didn't even mark Manzanita Springs because it's so unreliable.
7. Two small creeks west of Johns Meadow Camp. **** One or both of these is normally flowing year round. The stream just west of Johns Meadow Camp is the most convenient water source for the camp.
8. Forsee Creek. ***** This is the main fork of Forsee Creek. Absolutely the highest reliability rating.
9. E Fork Forsee Creek. **
10. Stetson Creek. **
11. Spring just east of Stetson Creek. ** Stetson Creek itself is usually dry here, but the little spring just to the east is frequently flowing, particularly in early season.
VI. The "Grand Tour" Loop.
Length: 26.1 miles round trip (trail only) or 28.9 miles round trip (including the road walk).
This back pack takes one on a "Grand Tour" of the SGW. It's basically a concatenation of the South Fork with the Forsee Creek Loop. The "Grand Tour" route is the most efficient way to summit all nine of the classic "nine peaks" of the SGW in a loop hike (San Bernardino Pk, East San Bernardino Pk, Anderson Pk, Shields Pk, Alto Diablo Pk, Charlton Pk, Little Charlton Pk, Jepson Pk, and San Gorgonio Mtn). Note: There is a 2.8 mile (per Google maps) road walk between the two trailheads.
 |
| The "Grand Tour" Loop. Right click and open in a separate tab or window to fully enlarge. |
One night plan: Get real. This is really at least a two night trip. But if your really have a need for speed, spend the night at High Meadow Springs (reliable water)
– and good luck. Yipes! This advice goes for most people, but obviously there are those fit enough to do this in a single day as a day hike. Doesn't sound like much fun to me. Day hike not recommended for all but the fittest of the fit. Single night out recommended only for the very fit and fast. Two night minimum for most people. Three nights is the best option.
Two night plan: Water is a bit of a limiting factor here. If there's snow up high, you might want to spend the first night at Summit Camp, melting snow for water. You second night could be at Trail Fork Springs***. If there's no snow, you could do a relatively short hike to Lodgepole Spring Camp (reliable water) the first day, then High Meadow Spring (reliable water) for your second night, but you'd have a very long day for your third.
Three night plan: If you've got the time, this is a nice option. Night one: Lodgepole Spring (reliable water). Night two: High Meadow Spring (reliable water). Night Three: Limber Pine Bench (seasonal water, but often present
– check conditions before you go). Hike out on day 4. This is the way to do it, in my opinion. Savor the high country. Spending the night at Limber Pine Bench gives one some fabulous views.
17 Peaks Variation: There are seventeen peaks with elevations above 10,000' (3048m) in the SGW. See my list of
Southern California Peaks above 10,000'/3048m for a list of those peaks. If one wanted to climb all seventeen of the 10,000 footers, this is the route to use. Change the above route as follows: Instead of going through Trail Flats after passing Dry Lake, go to Fish Creek Saddle. There is no trail marked on the USGS topo going to the saddle, but in fact there is one. The trail is no longer maintained regularly, but it gets plenty of use and is very followable. From Fish Creek Saddle, you can bag Grinnell Mtn, Ten Thousand Food Ridge (the highpoint), and Lake Peak. You'll re-join the "standard" Grand Tour route at Mine Shaft Saddle.
Map Notes:
1. All preceding map notes apply. See those notes for details.
2. Trailheads. Note that you either need to do a
car shuttle or that you need to walk between the trail heads. It's a bit of a walk between the trail heads, but I've done it, and it's not too bad. The walk is all along Jenks Lake Road which is neither a high traffic nor a high speed road.
Water Sources:
See the South Fork Loop and Forsee Loop for descriptions.
Final Word
As you can tell, I've just outlined these trips. I haven't gone into great detail. The maps themselves communicate much of what I have to say. Hopefully this gives you some ideas without taking away the challenge and fun of planning your own trip. Now, enjoy, be safe, and preserve the wilderness.
HJ
Appendix I
The six loops described above cover all the major hiking and backpacking areas in the SGW except one: the North Fork of the Whitewater River area. While no loop hike is available (at least on trail), the N Fork of the Whitewater River area is worth a visit. This area is probably one of the three least visited areas in the SGW.
 |
| N Fork Whitewater River Area. Right click and open in a separate tab in order to enlarge fully. |
The positions of the trail camps in this area are outrageously wrong. Mineshaft Flat Camp is shown up on the side of a hill. Um, no, Mineshaft
Flat Camp is in the
flat below. I have indicated the correct position with my usual black triangle. The camp area is actually fairly large, so you wouldn't necessarily be looking for a precise point. I have blotted out the incorrect position with a red hash mark.
Big Tree Camp is shown on the wrong side of the river. The key thing to note is that Big Tree Camp is on the NNE side of the river in the crook of the "Y" formed by the river and a small side stream. The black triangle again marks the correct location. I have blotted out the incorrect position with a red hash mark.
The ironic thing is that there is a large tree (a white fir) near the location marked by the USGS on their topo map, but that is not
the Big Tree, and that is not the correct position of the camp. The actual Big Tree (a massive ponderosa pine), for which the camp is named, died a few years ago and much of it lies on the ground.
 |
| The Big Tree. Imagine how tall it was when it still had its top. |
Map Notes:
1. As mentioned above, the positions of the trail camps marked on the USGS topo map are way off. Refer to the black triangles on the map for the correct locations.
2. There's an excellent short cut for those coming from the Dry Lake area that goes from just east of Lodgepole Spring up to Lodgepole Saddle. There is an old mining trail here that you can follow parts of, but the trail is no longer fully followable.
Water sources:
I'll start at Lodgepole Saddle go downhill from there. In some times and seasons, there may be other water sources; I'm just trying to hit some of the more important ones here and just those on the route.
1. Springs. **** Possibly five stars for the second spring. These springs are about 0.3 miles south of Mine Shaft Flat Camp. Both springs are just below the trail. The second spring is a real gusher and is pretty easy to find simply because it makes so much noise. There's also a pretty well worn path down to the spring.
2. N Fork Whitewater River. ***** After you cross the meadow, you have to cross the river since the camp is on the far side of the river. The river is extremely reliable.
3. Small Side Creek. **** Small, but actually pretty reliable. This is the most convenient water source for Big Tree Camp. If it's dry, no worries, just back track to the nearby N Fork of the Whitewater River.
Appendix II – Water Reliability Ratings
Now, since these ratings are based on personal observation, they're going to be somewhat subjective, but at the same time you should know that I've been hiking in the SGW since the 1960's. I actually have some basis for the ratings I give to a water source. If you disagree, please comment to that effect below,
but please tell me why.
* Unreliable. Assume no water unless you have a current report to the contrary. Example: Columbine Spring.
** Less reliable. Water typically in early season. Often dry in late season. Example: the spring above Fish Creek Camp.
*** More reliable. Water typically in late season in normal years. May be dry in late season in dry years. Example: Limber Pine Springs.
**** Very reliable. Water typically year round except possibly in multi-year droughts. Example: Lodgepole Springs.
***** Extremely reliable. Water year round even in multi-year droughts. Example: Forsee Creek.
Appendix III – Alphabetical List of Trail Camps of the SGW
You should be able to find the location of each of these camps on the maps in this blog post. I've listed the loop or area the camp is in after the name of the camp. Refer to the map of that loop or area for the location of a given camp. Since some of the loops overlap, several of the trail camps will be listed on more than one map. I've only listed one map per trail camp.
- Alger Creek (Momyer Creek - Vivian Creek Loop)
- Anderson Flat (Momyer Creek - Falls Creek Loop)
- Big Tree (N Fork Whitewater R area)
- Columbine Springs (Forsee Creek Loop)
- Dobbs (Momyer Creek - Vivian Creek Loop)
- Dollar Lake Forks (South Fork Loop)
- Dry Lake (South Fork Loop)
- Dry Lake View (South Fork Loop)
- Fish Creek (Grinnell Mountain Loop)
- Fish Creek Saddle (Grinnell Mountain Loop)
- Grinnell Ridge (Grinnell Mountain Loop)
- Halfway (Momyer Creek - Vivian Creek Loop)
- High Creek (Momyer Creek - Vivian Creek Loop)
- High Meadow Springs (Momyer Creek - Falls Creek Loop)
- Jackstraw Springs (Forsee Creek Loop)
- Johns Meadow (Forsee Creek Loop)
- Limber Pine Bench (Forsee Creek Loop)
- Lodgepole Spring (South Fork Loop)
- Mineshaft Flat (N Fork Whitewater R area)
- Red Rock Flat (Grand Tour)
- Saxton (Momyer Creek - Vivian Creek Loop)
- Shields Flat (Grand Tour)
- Summit (South Fork Loop)
- Trail Flats (South Fork Loop)
- Trail Fork Springs (Forsee Creek Loop)
- Vivian Creek (Momyer Creek - Vivian Creek Loop)